
Description
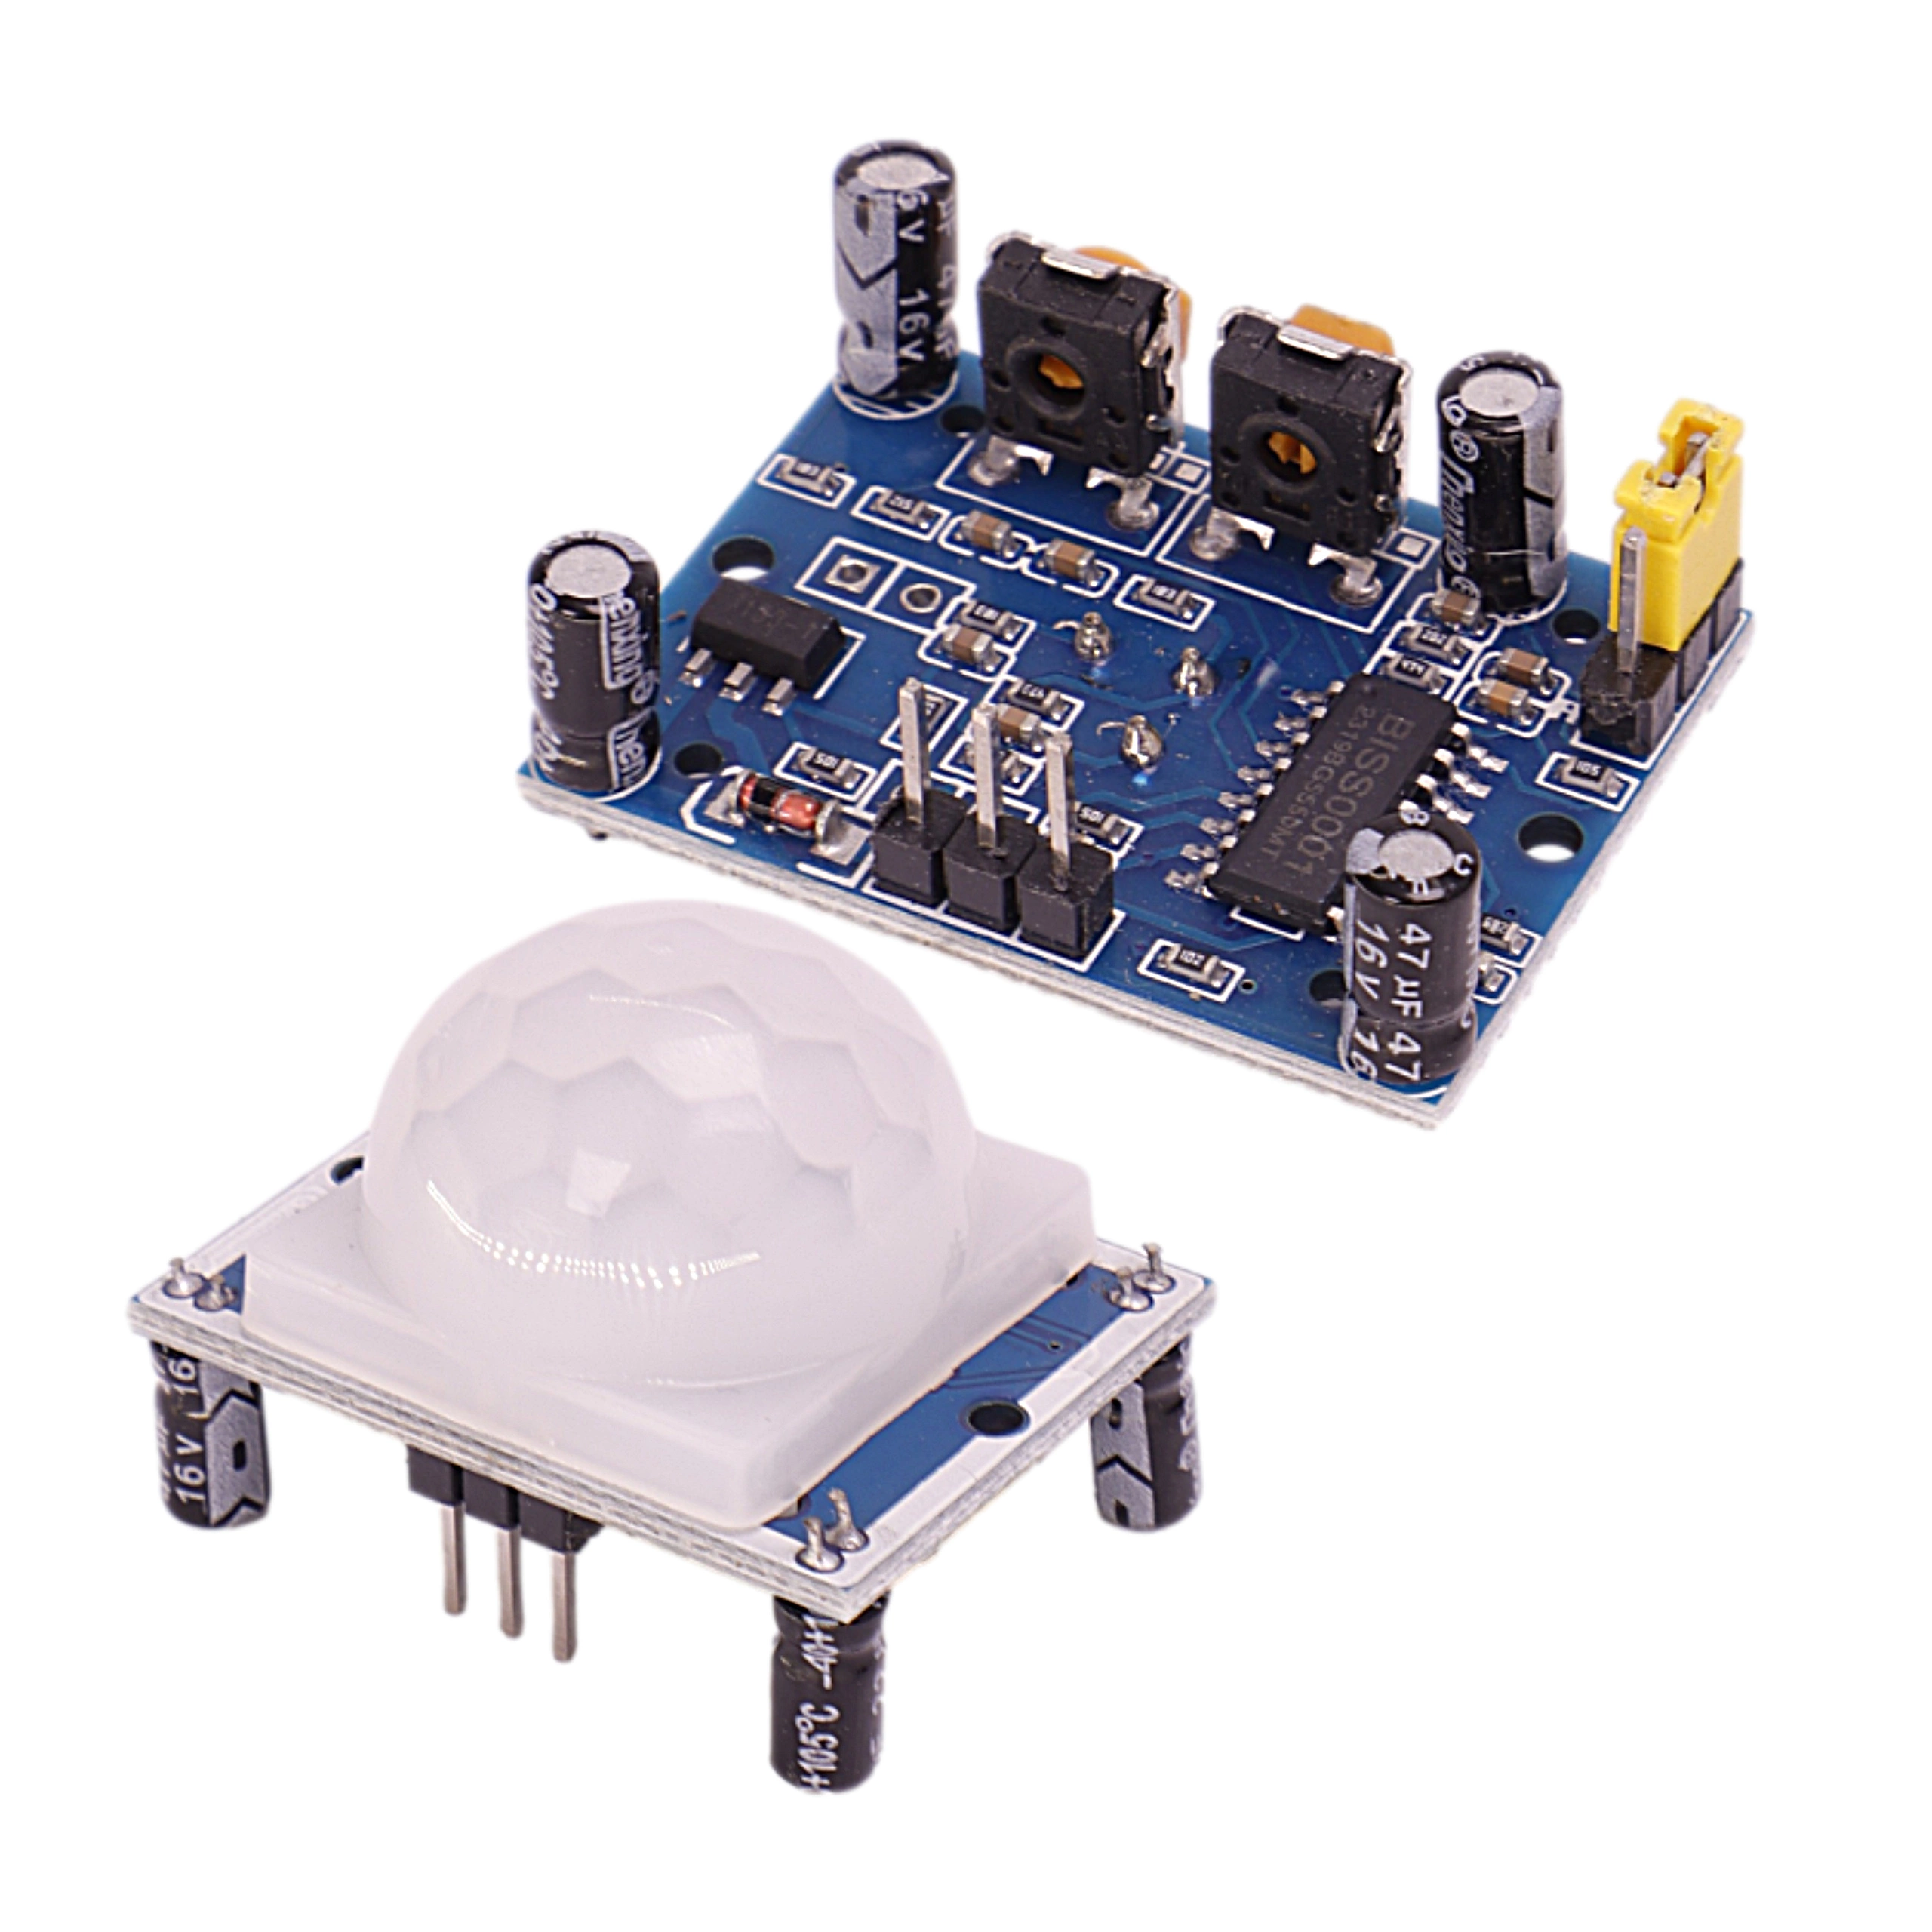
PIR motion sensor HC-SR501
Passive infrared PIR detector HC-SR501. Reacts to a change in infrared radiation (given off by objects with an increased temperature compared to its surroundings.
Perfect for warning system projects, alarms, robotics, etc.
We can attach the sensor with acrylic bracket.
Features of PIR motion sensor HC-SR501
- This type of sensor is used to detect objects and people in various types of rooms as part of lighting and alarm systems.
- Large supply voltage range of 5-20V allows for increased usability of this sensor
- Detection of any object is digitally signaled by a high state.
- It is possible to connect the sensor to the kit of any startup kit like Raspberry Pi or the more popular Arduino.
- Pinouts: 2.45 mm goldpin connectors
Technical data HC-SR501
- Power supply: 5 – 20V
- Approximate current consumption: 50 uA
- Sensitivity: up to 7m
- Viewing angle: up to 100 °
- Operating temperature: -15°C – 70°C
- Dimensions: 33x25x25mm
- Bowl diameter: 23 mm
- Height of the canopy: 18 mm
- Total height: 30 mm (including components mounted in the bottom of the plate)
- Digital output:
- High state – object detected
- Low state – no object
Useful links – Example connection to Arduino
- http://robotic-controls.com/learn/sensors/pir-sensor-hc-sr501
- http://www.arduino.info.en/pir-hc-sr501-motion-sensor/
Description of the leads on the HC-SR501 sensor board
Notes for connecting the sensor
- RESET jumper (to be soldered in)
- Auto reset – retriggerin (jumper in H position) – the output reaches a high state when an object is detected and it is maintained for the entire time of detecting ongoing motion, the sensor is in this mode by default (no jumper)
- NO reset – non-retriggering (jumper in L position) – the output reaches a high state only once when an object is detected, then goes low regardless of whether motion continues to occur
- Connect the power supply (4.5 V to 20 V) to the external leads marked VCC and GND, respectively, in the figure above.
- Detection of an object, in the field of view of the sensor, is signaled by a high state appearing on the OUT pin
- With the potentiometers, the user can adjust:
- T1 – duration of high state after object detection
- T2 – the length of the measurement interval after the high state has ended

Reviews
There are no reviews yet.